Our technical support team has repeatedly encountered a situation where customers remotely managed servers via IP KVM, and when a serious system failure occured access to them was lost. Even though their server has everything you need to use the IPMI (Intelligent Platform Management Interface) by default. Actually, you need to spend just 5 minutes for initial setup, and system hangs will no longer be a problem.
Next in this article: iDRAC versions, licensing types and features. If you opened this article just to set up iDRAC, click here.
IPMI v0.9 technology was first announced at the Spring '98 Intel Developer Forum. First specification of IPMI 1.0 came out on September 16, 1998, that is 23 years ago, thanks to joint efforts of Intel, HP, Dell and NEC. Nowadays, based on version 2.0 of this standard many vendors offer their own proprietary modifications:
-
Dell – iDRAC;
-
HPE – iLO;
-
IBM/Lenovo – IMM;
-
Cisco – IMC;
-
Supermicro – SIM;
-
Fujitsu - iRMC;
-
And many more...
I suppose, there is no point in cramming this diversity into one article, since there are too many implementations. So I decided to shake the dust off this technology in a series of articles on Dell, HPE and Lenovo solutions. Let's start with iDRAC.
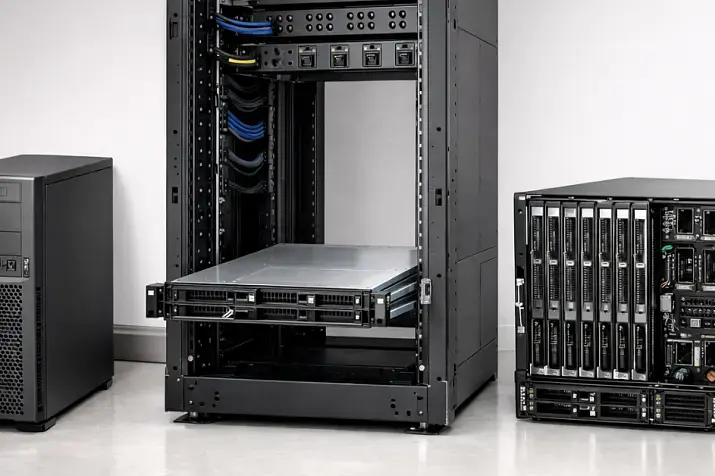
DELL IPMI Servers

What is iDRAC?
iDRAC (integrated Dell Remote Access Controller) is a proprietary remote access, monitoring and management controller built into almost all Dell PowerEdge servers (except the little ones: T20, T30, T40). The IPMI concept implies a BMC (Baseboard Management Controller).

IPMI block diagram.
An interesting fact.
As to naming, it can be a bit confusing. If you get your hands on a Gen 10 (or older) Dell server with old iDRAC firmware, you won't see the DRAC marketing name. Both in GUI (graphical user interface) and CLI (command-line interface), the technology was labeled simply as BMC. Yes, later updates came out, and all the versions active at the time were renamed, bringing them into accordance, but it wasn't always like that. So don't be surprised that in your memories there was no DRAC at all, but only BMC.
IMPORTANT: When I mention BMC in this article, I will be referring to the hardware controller (SoC) on which the iDRAC technology runs.
Why is iDRAC technology needed, in the first place? Actually, it is an intermediate between a system administrator and a server. User sends IPMI messages to BMC controller without addressing server components directly. So for basic use of iDRAC, server does not need additional expansion boards, OS, hypervisor and all that. Just plug power and a network cable into the iDRAC port (dedicated or co-located) and you are ready to work.
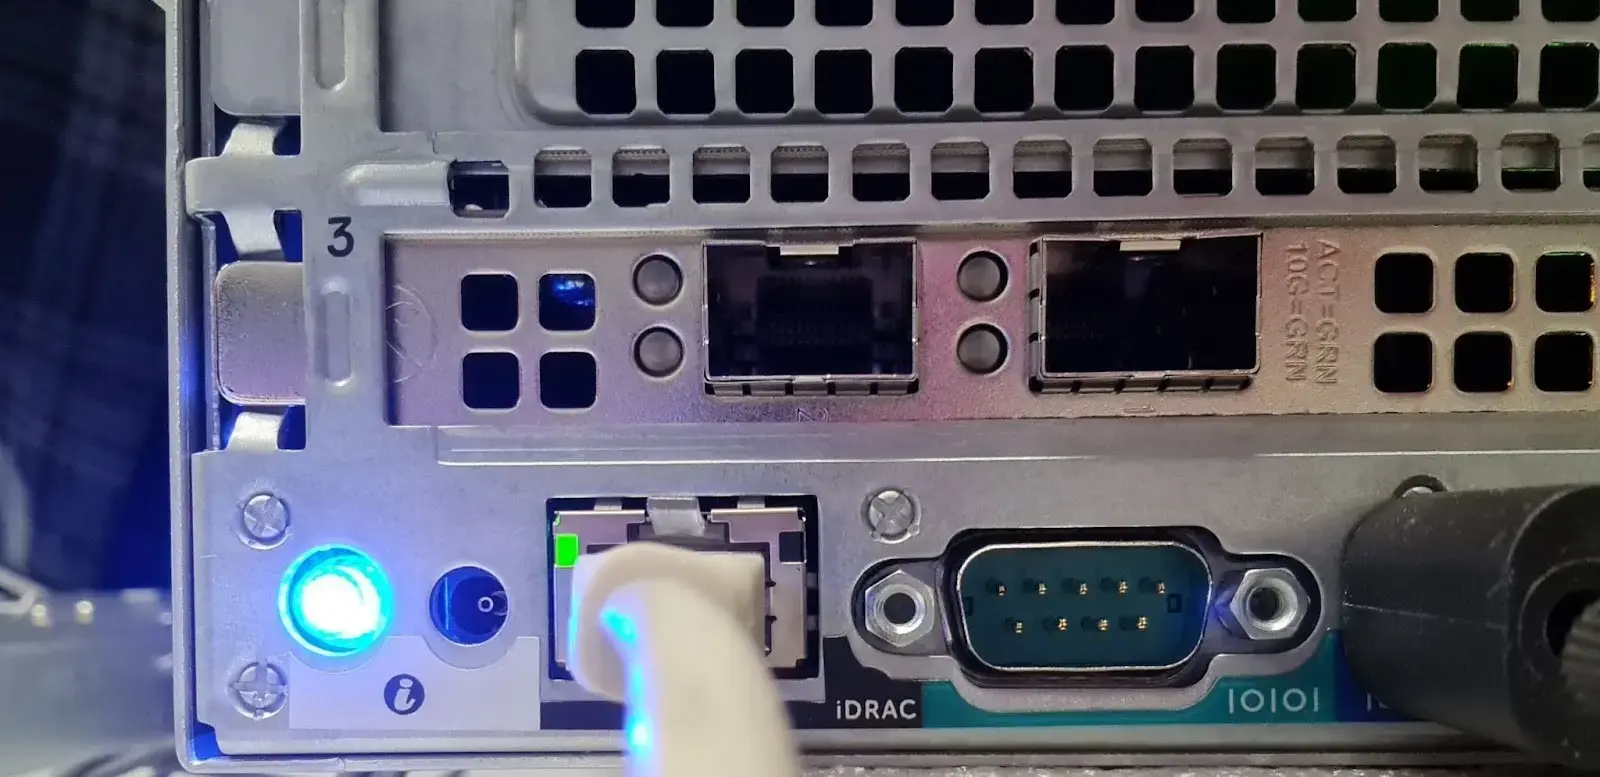
BMC controller is soldered on the server motherboard. Via system bus and using Lifecycle Controller technology, this SoC communicates with all server components as well as with the iDRAC Remote Card network adapter (optional for iDRAC 8 and below), which has a dedicated 8P8C connector designed specifically for iDRAC. If a Remote Card is not installed, iDRAC will have to use one of server ports (LOM), which may limit network capabilities in some scenarios.
Some Features of iDRAC
Since iDRAC grew out of IPMI, some of its characteristics may strongly resemble the latter. Remote control interfaces are worth using for the following reasons:
- Independent hardware controller.

iDRAC controller has its own hardware and software. It is powered by the standby voltage (+5V Standby), so it works even when the server is off. Thus, if main server OS hangs up and stops responding to commands, it can be rebooted remotely.
- Integrated.
Starting with version 6, Dell embeds the iDRAC controller in all their servers (except T20, T30, T40). Regardless of the type of network port used (dedicated or co-located), transmitted data will be out-of-band, and access to the server can be arranged through both local and external networks.
- Own web-based GUI.
Starting with iDRAC 2.6, you no longer need a JRE. Now everything needed for basic functionality is out-of-box. You just need to run a browser, log in to the appropriate address, and then you can remotely control power, update firmware (including BIOS), monitor hardware units state, etc.
- Expansion.
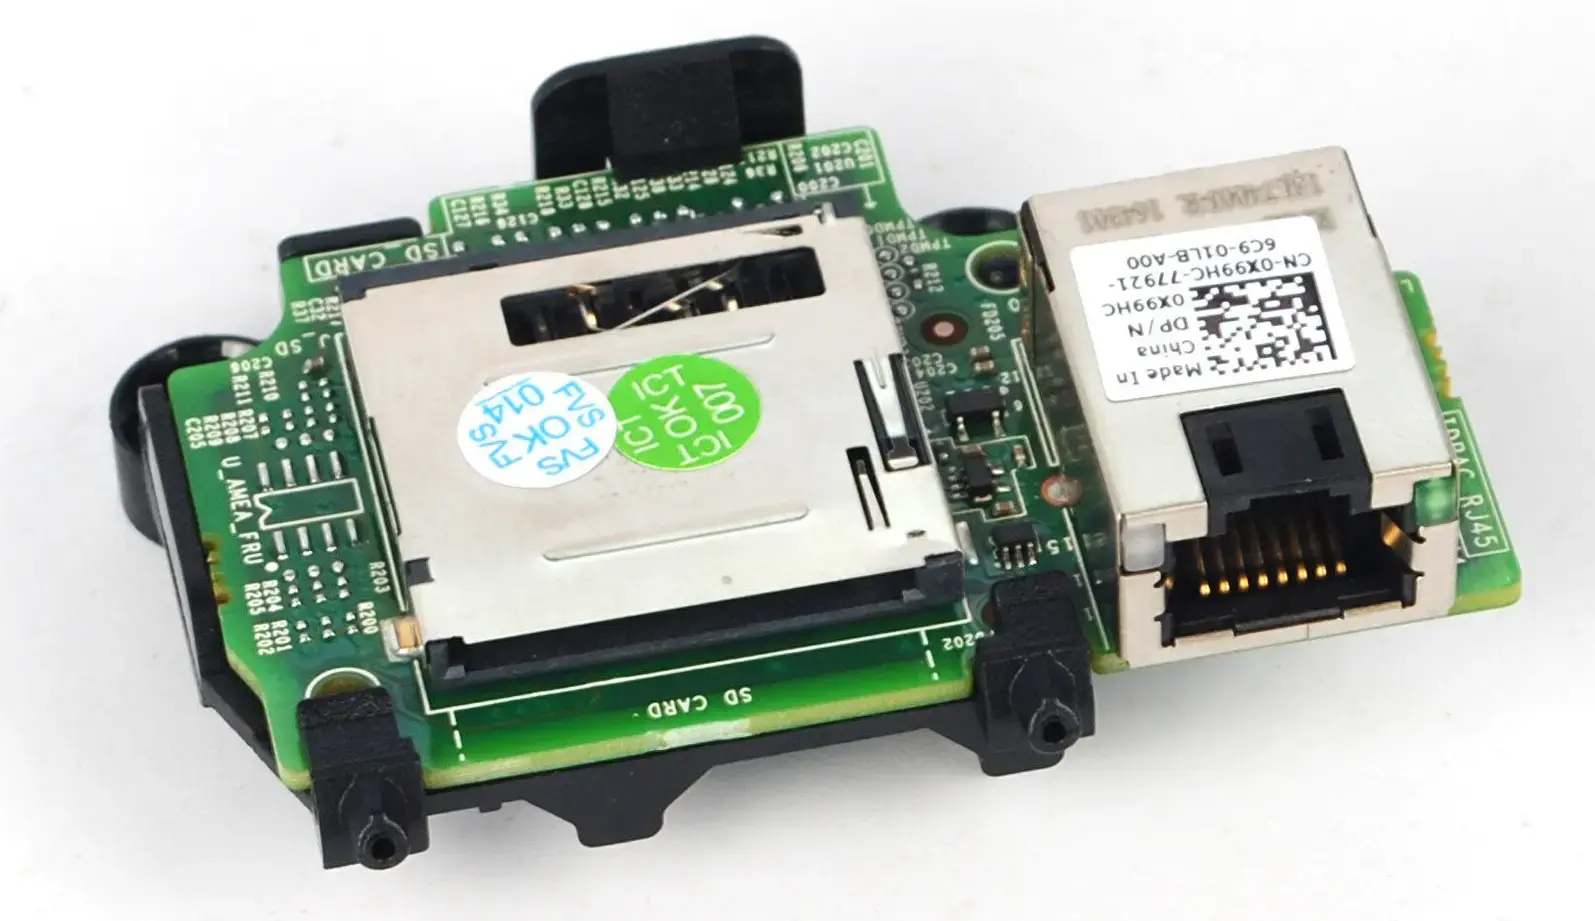
Dell iDRAC 8 Enterprise Card.
By default, iDRAC is free, but its capabilities can be expanded with a paid license and additional Remote Card network adapter. By default, 100-500 Series servers come without it, which makes it impossible to buy an Enterprise or higher license. This is already not relevant for Gen 14 servers: all of them have a dedicated 8P8C iDRAC port with paid license support.
Types of Licenses
Different versions of iDRAC have different licensing options, so we will only discuss version 9. First of all, all Dell servers have a Basic or Express license by default, but you have to pay extra to extend their capabilities.
|
Type of iDRAC 9 license |
For 100-500 Series |
For 600+ Series |
|
Basic: Basic toolkit with the iDRAC web-based GUI. This license is included in rack servers and Tower 100-500 Series servers by default. |
Available out-of-box |
Not available |
|
Express: All Basic features + advanced remote control and server lifecycle control. This license is included in rack, Tower and blade servers of Series 600 and above. |
Need to buy |
Available out-of-box |
|
Enterprise: All Express features and additional remote presence features with advanced enterprise-class management capabilities. |
Need to buy |
Need to buy |
|
Datacenter: All Enterprise features and additional features, such as advanced remote server dashboard focused on high-end server options and detailed power and temperature control. |
Need to buy |
Need to buy |
All licenses are perpetual – no "one-year edition" and subscriptions of any kind. License can be purchased before the server is delivered, or you can buy it later by downloading from Dell Digital Locker or through the Dell partners. Of course, you need a separate license for each server. You can't buy one for the whole cluster.
There is also a free 30 or 90 days trial, see more details here.
iDRAC 9 License Features
New features in iDRAC 9 are highlighted in bold italics.
Note: More advanced license includes all the capabilities of the previous one.
|
Basic |
Express |
Enterprise |
Datacenter |
|
User interfaces: HTML5 Graphical Web User Interface, Redfish, WS-Man, IPMI 2.0, DCMI 1.5, RACADM, SMASH-CLP, Telnet, SSH, Serial Forwarding. Connectivity options: Common LOM card, dedicated network card, VLAN, IPv4/6, DHCP, static IP address, dynamic DNS, iDRAC Direct (USB port), connectivity view, NFS v4, NTLMv1/2. Security: Silicon root of trust in iDRAC and boot, signed firmware updates, RBAC, local users, SSL/TLS encryption, FIPS, UEFI certificates, default security password (random), customizable security banner for login. Remote presence: Power management, boot management, serial LAN connection (SOL). Power and temperature: Real-time power meter, temperature monitoring, adjustable air outlet temperature. Status monitoring: Full agentless monitoring, failure prediction (including triggering Smart alerts), SNMPv1/2/3, fans, power supply units, memory, CPU, RAID, network card, direct-attached data storage shelves, SSD wear levels. Firmware update: Remote, agentless update, built-in update tools (F10/iDRAC graphical user interface). Deployment: Local configuration using the F10 LC GUI, remote OS deployment, BIOS and RAID configuration pages, remote server setup, server configuration profile (SCP) import/export, OS driver package, system inventory, deleting system data for server repurposing or decommissioning. Troubleshooting, maintenance and logging: SEL and Lifecycle Controller logs, diagnostic tools, server configuration recovery, simple recovery after system board replacement, health status indicators, front panel LCD (optional), iDRAC Direct service port, iDRAC remote and local reset, virtual NMI, OS watchdog, SupportAssist collection report, SupportAssist direct registration, operational notes, license management. GUI enhancements: New search box for easier navigation, job queue overview, collapsed accordion style for faster page loading, SupportAssist collection view in graphical user interface. |
NTP SKU automatic detection |
Zero Touch/Automatic set up
Automatic updates/synchronization with a repository
MAC Address Reporting Service (MARS)
Connectivity view: starting with Gen 13 servers, LLDP transfer function has been added for automatic discovery using L2 switches |
Detailed analysis and control
Telemetry streaming – streaming via Redfish SSE, Redfish subscription or Rsyslog
Sequential forwarding log in the console
SMART logs for SAN drives
Inventory and monitoring of GUI
Inventory and monitoring of input/output over SFP+ optical cable
Inactive server detecting |
|
PKI authentication Filtering by IP address range (up to 5) Password length (up to 40 characters) |
Directory services (AD/LDAP)
Two-factor authentication (2FA)
Single Sign-On (SSO)
System lock mode
Simple multi-factor authentication |
Advanced security
Automatic SSL Certificate Update (SCEP) |
|
|
Thresholds and alerts for energy consumption Real-time diagrams of energy consumption Historical energy consumption meters Temperature diargrams |
Virtual storage media and folders
Remote file share
Virtual console with HTML5 or VNC
Quality/throughput control
Collaboration (up to 6 users)
Virtual console chat |
Temperature control features
PCIe air flow setting (LFM)
Customizable air exhaust control
Customizable Delta-T control
Airflow rate in the system
Customizable PCIe input temperature |
|
|
Email notification |
Group Manager 250 units support |
||
|
Parts replacement |
Performance Monitoring via additional channel
Remote system log for alerts |
Virtual clipboard for cut and paste operations in the remote HTML5 console |
|
|
Remote OS deployment |
Power consumption limits and OMPC integration |
||
|
Emergency shutdown screen display |
Crash screen video (without agents for Windows Server OS)
Loading image |
Versions
We have already discussed the confusion related to BMC and iDRAC naming. But it deals with technical side. And when it comes to marketing names, until 2008, iDRAC was simply called DRAC, since it was not soldered to the server base and was a discrete card.
Dell DRAC 4/P.
Unfortunately, I could not find any information on DRAC I. But taking into account that IPMI 1.0 standard came out in 1998, we can assume that either Dell started immediately with the second version, or introduced their first version of DRAC at the same time as IPMI.
|
Year |
1999 |
2002 |
2005 |
2006 |
2008 |
2012 |
2014 |
2017 – up to now |
|
Version |
DRAC II |
DRAC III |
DRAC 4 |
DRAC 5 |
iDRAC 6 |
iDRAC 7 (Gen 12 servers) |
DRAC 8 (Gen 13 servers) |
iDRAC 9 (Gen 14 and Gen 15 servers) |
DELL IPMI Servers


Let's assume that you bought a Dell server, connected power and a network cable to it. What's next? Of course, you have to configure the iDRAC IP address. And there are several options here:
-
iDRAC settings utility
-
Lifecycle Controller
-
Dell deployment toolkit
-
Server LCD panel (optional)
-
Web-based CMC (Chassis Management Controller) – only for blade servers. IMPORTANT: For blade servers, the IP address can be configured via the chassis display, but only during the CMC initial setup.
Dell recommends using the first way. I assume, because of its versatility and simplicity. That's what we're going to look at.
How to Configure iDRAC 9
1. Turn on your server and during the POST (Power-On Self-Test) procedure press F2.
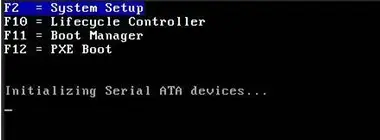
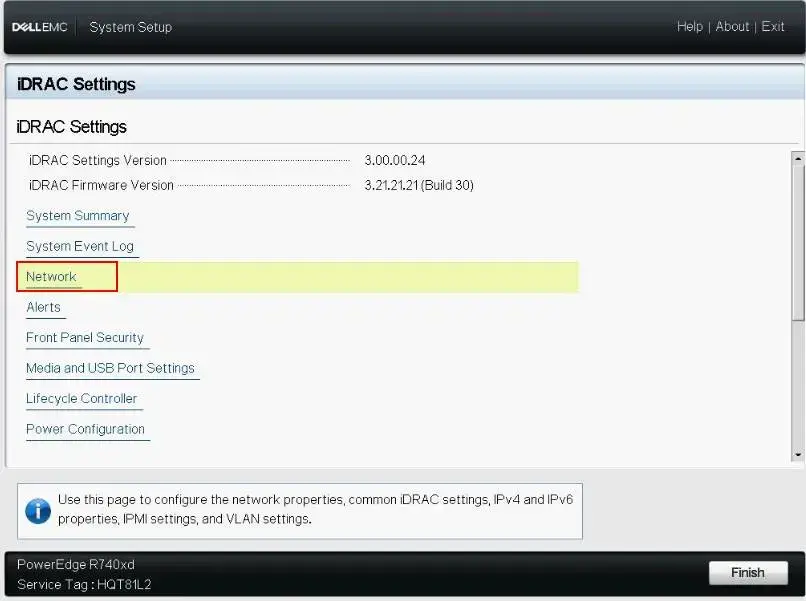
2. Then the System Setup Main Menu opens, select iDRAC Settings.

3. Next, go to Network.
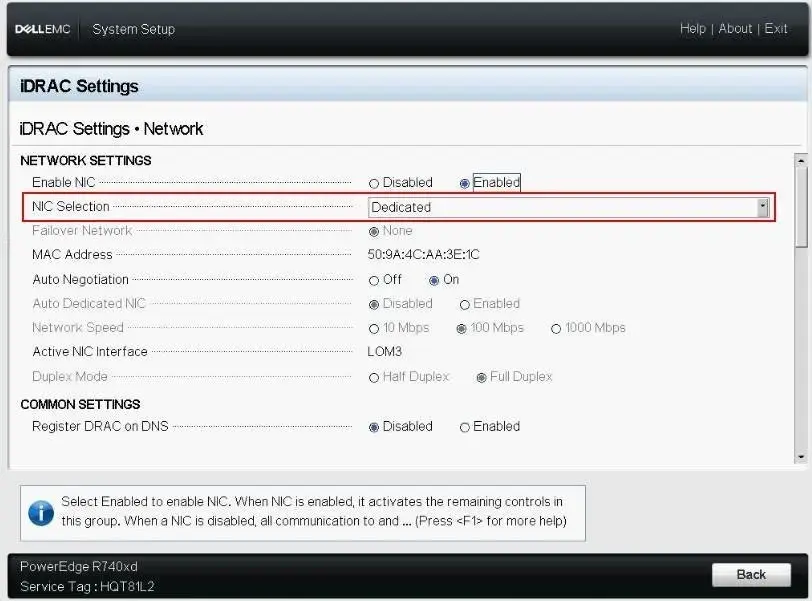
4. After that, configure network settings:
-
In the Enable NIC line, select Enabled.
-
In the NIC Selection line, select one of the following ports:
-
Dedicated – allows you to use a dedicated port on the iDRAC Remote Card. This network interface will not be shared with the host. For blade servers this parameter is shown as Chassis (Dedicated).
-
LOM1
-
LOM2
-
LOM3 or 4 – may be not available depending on server model and network card selected.
-
In the Failover Network line, select one more LOM port. If your main network fails, traffic will go to the selected channel. If you selected Dedicated in the second line, the Failover Network option will be disabled.
-
In the Auto Negotiation line, select On if you want iDRAC to set the duplex mode and network speed automatically. This option works with the Dedicated mode.
-
In the Network Speed line, select 10Mbps or 100Mbps. The 1Gbit/s option is available if Auto Negotiation is enabled.
-
In the Duplex Mode line, select Half Duplex or Full Duplex. This option is not available if Auto Negotiation is set to Enabled.
5. General settings.
If your infrastructure has a DNS server, you need to register your iDRAC on DNS. This is required for advanced features: Active Directory or LDAP, Single Sign On and smart cards.
Follow these steps to register your iDRAC:
-
In the Register DRAC on DNS line check Enable.
-
Enter a name in the DNS DRAC Name line.
-
Select Auto Config Domain Name to automatically obtain a domain name from DHCP if you did not enter it manually in the DNS DRAC Name line.
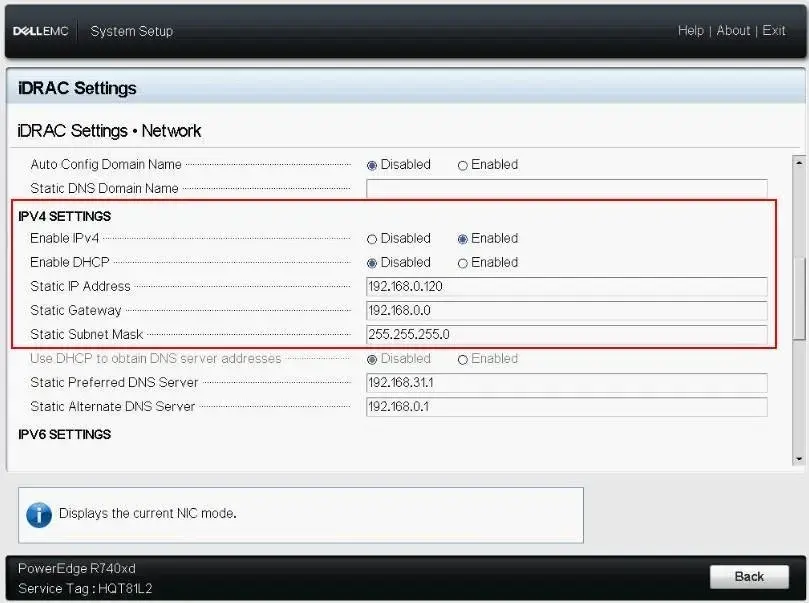
6. Configure the IPv4 settings:
-
In the Enable IPv4 line, select "Enabled".
-
Select Enable DHCP in the Enabled line so that the IP address, gateway, and subnet mask settings are automatically set for your iDRAC. If you select Disabled, you will need to enter values for:
-
Static IP Address
-
Static Gateway
-
Static Subnet Mask
7. Configure the IPv6 settings:
-
In the Enable IPv6 line, select Enabled.
-
In the Enable Auto-configuration line, check Enabled – then the DHCPv6 server will automatically assign an IP address, gateway, and subnet mask to your iDRAC.
-
Enter a static IPv6 address in the Static IP Address 1 field.
-
In the Static Prefix Length field, enter a value between 0 and 128.
-
In the Static Gateway field, enter gateway address.
-
If you are using DHCP, enable DHCPv6 to get the DNS server address to obtain primary and secondary DNS server addresses from the DHCPv6 server. If necessary, you can set up the following:
-
In the Static Preferred DNS Server field, enter your DNS server static IPv6 address.
-
In the Static Alternate DNS Server field, enter the static alternate DNS server address.
8. Press Back or Esc.
9. Click Finish and confirm changes in the pop-up window.

10. After this, your network settings will be saved and iDRAC setup is now complete.

11. Now you can use your server management web-based UI via any supported browser. Important! Don't forget to change the default username and password!
Note: iDRAC 9 has a default secure password option. To find it, get the Service Tag on the server front panel and look for the iDRAC Default Password field.
A secure password used to be optional, but after changes in California law (Bill 327 (SB327)), all servers must be protected by a unique password by default. Therefore, in the latest editions of the Dell Gen 14 servers, standard password has been replaced with a secure password. Worldwide.

Service Tag with a default secure password.
-
Service Tag (top view).
-
Service Tag (bottom view).
-
Open Manage Mobile (OMM) label.
-
Sticker with iDRAC MAC address and password-protected iDRAC.
-
Service Tag.
A Small Step for Admin, a Big Leap for Support
After setup, enter the IP address of your iDRAC in the address bar of your browser. There is one more way to connect – using CLI (SSH, RACADM). In the opened interface enter your standard login and password: "root" and "Calvin", respectively. If your server has a secure password, pull out the retractable label and locate it (as in the picture above).

The iDRAC 9 web interface login window with a secure password request.

The iDRAC 9 control panel.
Conclusion
iDRAC basic version is installed in almost all modern (and not so modern) models of the Dell servers. It may seem like a free technology built into the server. Yes, you do not have to pay extra for Basic or Express versions (in older models), but when you buy a Dell server, you pay in advance for iDRAC hardware controller and its capabilities. So why not use the full potential of this technology? Especially since initial setup will not take much time, but will more than compensate for it in the future.
iDRAC 9 hardware independence, tight integration with your server hardware and various sensors opens up opportunities that IP KVM does not have.
No comments
Write the comment